8.15: Editing and Enhancing a PowerPoint Presentation
- Page ID
- 46207
\( \newcommand{\vecs}[1]{\overset { \scriptstyle \rightharpoonup} {\mathbf{#1}} } \)
\( \newcommand{\vecd}[1]{\overset{-\!-\!\rightharpoonup}{\vphantom{a}\smash {#1}}} \)
\( \newcommand{\id}{\mathrm{id}}\) \( \newcommand{\Span}{\mathrm{span}}\)
( \newcommand{\kernel}{\mathrm{null}\,}\) \( \newcommand{\range}{\mathrm{range}\,}\)
\( \newcommand{\RealPart}{\mathrm{Re}}\) \( \newcommand{\ImaginaryPart}{\mathrm{Im}}\)
\( \newcommand{\Argument}{\mathrm{Arg}}\) \( \newcommand{\norm}[1]{\| #1 \|}\)
\( \newcommand{\inner}[2]{\langle #1, #2 \rangle}\)
\( \newcommand{\Span}{\mathrm{span}}\)
\( \newcommand{\id}{\mathrm{id}}\)
\( \newcommand{\Span}{\mathrm{span}}\)
\( \newcommand{\kernel}{\mathrm{null}\,}\)
\( \newcommand{\range}{\mathrm{range}\,}\)
\( \newcommand{\RealPart}{\mathrm{Re}}\)
\( \newcommand{\ImaginaryPart}{\mathrm{Im}}\)
\( \newcommand{\Argument}{\mathrm{Arg}}\)
\( \newcommand{\norm}[1]{\| #1 \|}\)
\( \newcommand{\inner}[2]{\langle #1, #2 \rangle}\)
\( \newcommand{\Span}{\mathrm{span}}\) \( \newcommand{\AA}{\unicode[.8,0]{x212B}}\)
\( \newcommand{\vectorA}[1]{\vec{#1}} % arrow\)
\( \newcommand{\vectorAt}[1]{\vec{\text{#1}}} % arrow\)
\( \newcommand{\vectorB}[1]{\overset { \scriptstyle \rightharpoonup} {\mathbf{#1}} } \)
\( \newcommand{\vectorC}[1]{\textbf{#1}} \)
\( \newcommand{\vectorD}[1]{\overrightarrow{#1}} \)
\( \newcommand{\vectorDt}[1]{\overrightarrow{\text{#1}}} \)
\( \newcommand{\vectE}[1]{\overset{-\!-\!\rightharpoonup}{\vphantom{a}\smash{\mathbf {#1}}}} \)
\( \newcommand{\vecs}[1]{\overset { \scriptstyle \rightharpoonup} {\mathbf{#1}} } \)
\( \newcommand{\vecd}[1]{\overset{-\!-\!\rightharpoonup}{\vphantom{a}\smash {#1}}} \)
\(\newcommand{\avec}{\mathbf a}\) \(\newcommand{\bvec}{\mathbf b}\) \(\newcommand{\cvec}{\mathbf c}\) \(\newcommand{\dvec}{\mathbf d}\) \(\newcommand{\dtil}{\widetilde{\mathbf d}}\) \(\newcommand{\evec}{\mathbf e}\) \(\newcommand{\fvec}{\mathbf f}\) \(\newcommand{\nvec}{\mathbf n}\) \(\newcommand{\pvec}{\mathbf p}\) \(\newcommand{\qvec}{\mathbf q}\) \(\newcommand{\svec}{\mathbf s}\) \(\newcommand{\tvec}{\mathbf t}\) \(\newcommand{\uvec}{\mathbf u}\) \(\newcommand{\vvec}{\mathbf v}\) \(\newcommand{\wvec}{\mathbf w}\) \(\newcommand{\xvec}{\mathbf x}\) \(\newcommand{\yvec}{\mathbf y}\) \(\newcommand{\zvec}{\mathbf z}\) \(\newcommand{\rvec}{\mathbf r}\) \(\newcommand{\mvec}{\mathbf m}\) \(\newcommand{\zerovec}{\mathbf 0}\) \(\newcommand{\onevec}{\mathbf 1}\) \(\newcommand{\real}{\mathbb R}\) \(\newcommand{\twovec}[2]{\left[\begin{array}{r}#1 \\ #2 \end{array}\right]}\) \(\newcommand{\ctwovec}[2]{\left[\begin{array}{c}#1 \\ #2 \end{array}\right]}\) \(\newcommand{\threevec}[3]{\left[\begin{array}{r}#1 \\ #2 \\ #3 \end{array}\right]}\) \(\newcommand{\cthreevec}[3]{\left[\begin{array}{c}#1 \\ #2 \\ #3 \end{array}\right]}\) \(\newcommand{\fourvec}[4]{\left[\begin{array}{r}#1 \\ #2 \\ #3 \\ #4 \end{array}\right]}\) \(\newcommand{\cfourvec}[4]{\left[\begin{array}{c}#1 \\ #2 \\ #3 \\ #4 \end{array}\right]}\) \(\newcommand{\fivevec}[5]{\left[\begin{array}{r}#1 \\ #2 \\ #3 \\ #4 \\ #5 \\ \end{array}\right]}\) \(\newcommand{\cfivevec}[5]{\left[\begin{array}{c}#1 \\ #2 \\ #3 \\ #4 \\ #5 \\ \end{array}\right]}\) \(\newcommand{\mattwo}[4]{\left[\begin{array}{rr}#1 \amp #2 \\ #3 \amp #4 \\ \end{array}\right]}\) \(\newcommand{\laspan}[1]{\text{Span}\{#1\}}\) \(\newcommand{\bcal}{\cal B}\) \(\newcommand{\ccal}{\cal C}\) \(\newcommand{\scal}{\cal S}\) \(\newcommand{\wcal}{\cal W}\) \(\newcommand{\ecal}{\cal E}\) \(\newcommand{\coords}[2]{\left\{#1\right\}_{#2}}\) \(\newcommand{\gray}[1]{\color{gray}{#1}}\) \(\newcommand{\lgray}[1]{\color{lightgray}{#1}}\) \(\newcommand{\rank}{\operatorname{rank}}\) \(\newcommand{\row}{\text{Row}}\) \(\newcommand{\col}{\text{Col}}\) \(\renewcommand{\row}{\text{Row}}\) \(\newcommand{\nul}{\text{Nul}}\) \(\newcommand{\var}{\text{Var}}\) \(\newcommand{\corr}{\text{corr}}\) \(\newcommand{\len}[1]{\left|#1\right|}\) \(\newcommand{\bbar}{\overline{\bvec}}\) \(\newcommand{\bhat}{\widehat{\bvec}}\) \(\newcommand{\bperp}{\bvec^\perp}\) \(\newcommand{\xhat}{\widehat{\xvec}}\) \(\newcommand{\vhat}{\widehat{\vvec}}\) \(\newcommand{\uhat}{\widehat{\uvec}}\) \(\newcommand{\what}{\widehat{\wvec}}\) \(\newcommand{\Sighat}{\widehat{\Sigma}}\) \(\newcommand{\lt}{<}\) \(\newcommand{\gt}{>}\) \(\newcommand{\amp}{&}\) \(\definecolor{fillinmathshade}{gray}{0.9}\)Learning Outcomes
- Add, delete, and move slides
- Insert text boxes
- Change theme on a presentation
Now that you’ve created a presentation, let’s start adding to it! If you closed your presentation after saving, you can reopen it by starting PowerPoint and selecting your presentation (i.e., To-the-Bank Retail Trends) listed under Recents.
Adding Slides
You can add a slide from either the Home tab, Insert tab or Thumbnail pane.
From the Home Tab

- Click on New Slide (or Duplicate Slide, to copy the current slide layout)
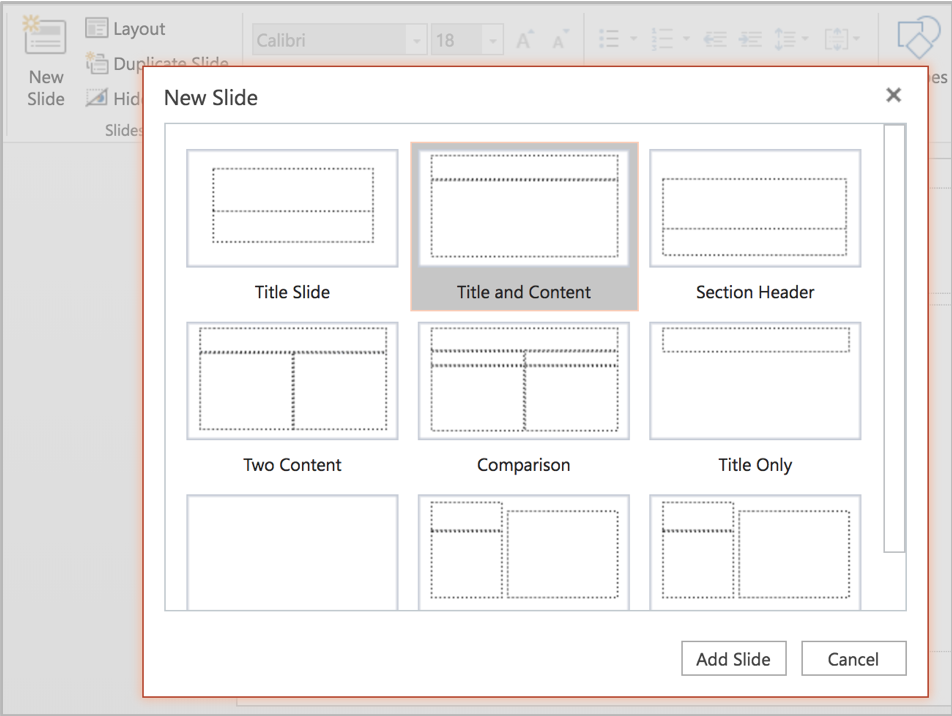
- If you clicked New Slide, select a layout that best fits your content
- Press enter

From the Insert Tab

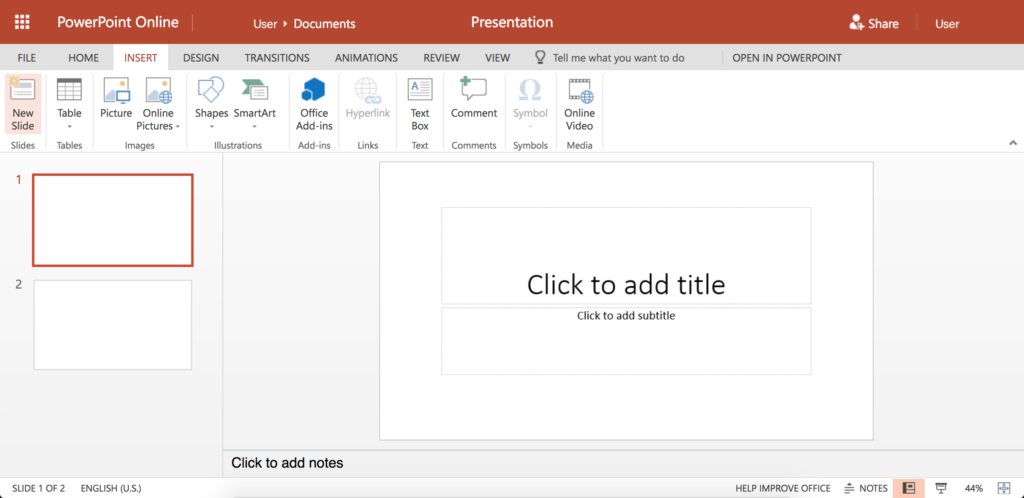
- Click on New Slide
- Select a layout
- Press enter
From the Thumbnail Pane

You can also add slides from the thumbnail pane, the lefthand column of your screen when you’re in the default or Slide view.
- Select (highlight) the slide you want the new slide to follow
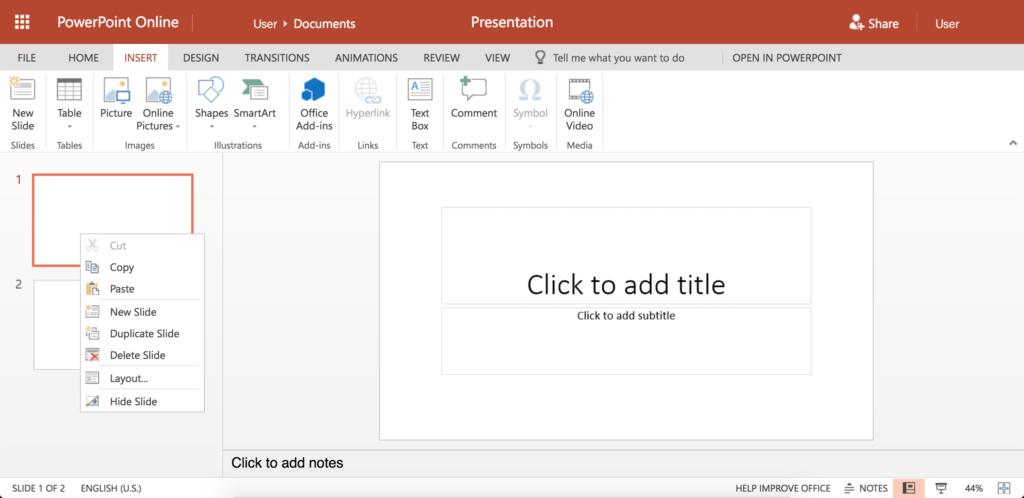
- Right-click on the slide
- Select New Slide for the default content slide layout or Duplicate Slide to copy the slide layout and content
OR, to use a shortcut to duplicate the slide layout (not content)
- Select (highlight) the slide you want the new slide to follow
- Press Ctrl + M (PC) or Cmnd + M (Mac)
Note that your layout choice isn’t final, so don’t overthink the decision. If you’re just trying to get your thoughts down on slides, select Duplicate Slide and fine-tune later.
Deleting a Slide
As with most operations, there are multiple ways to delete a slide:
- Highlight the slide in the thumbnail pane and press delete
- Highlight the slide in the thumbnail pane and press the delete icon (Home tab)
- Highlight the slide in the thumbnail pane, right click and select Delete Slide
Organizing Slides
To move a slide, simply drag and drop in the thumbnail frame.
Practice Questions
Inserting Text Boxes
There are multiple ways to insert text into your slides. One of the ways to enter text, as discussed earlier, is to click inside a placeholder box and enter your text. However, you may want to add text to a blank slide or in a place where there is no placeholder. To do so, select the Insert tab on the ribbon, and choose Text Box.
A text box will be inserted in your slide with a Click to insert text message similar to the placeholder Title and Subtitle boxes discussed earlier. The text box will expand to fit your text. If you decide you want to reposition the text box, you can click and move the text box/text around the slide. If you want to modify the width of the text box, click on a corner and drag it out as desired. The circular icon at the top of the text box activates the drawing and formatting options and allows you to rotate the text box.
Changing the Theme on a Presentation
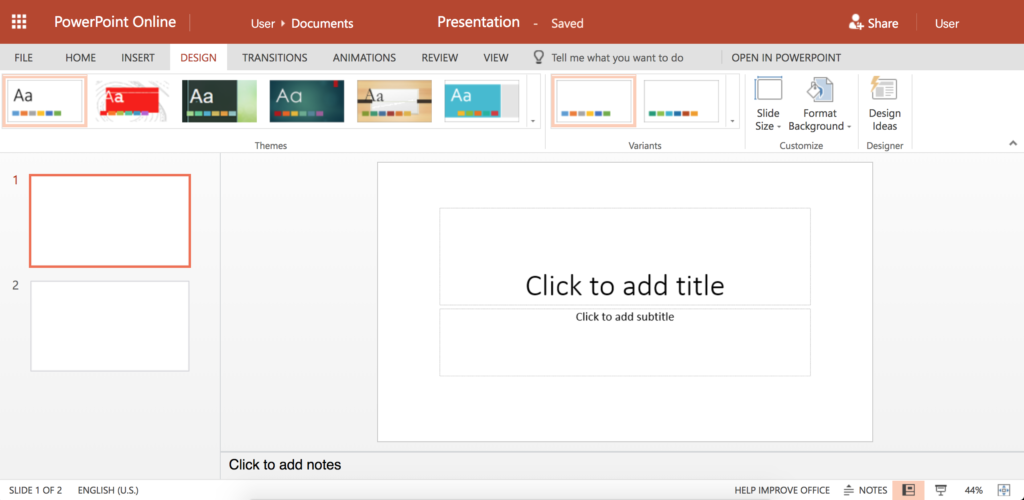
Themes are one of the formatting options within PowerPoint. A theme is a slide design that contains pre-set colors, fonts, formatting and/or images. To view formatting options, click on the design tab and scroll through the available themes.

Clicking on a theme’s thumbnail applies the formatting to your slides, so you can evaluate potential fit. A second group of options in the ribbon provides color variations on that design. A third option, exclusive to the online version of PowerPoint, is Design Ideas, providing additional variations; this feature is still being built out. To revert to your original format, click Undo.
One caveat: given the limited number of templates and the number of people using PowerPoint, using a standard template doesn’t do anything to distinguish you or your message. Instead of selecting a standard template, use thoughtful images and complementary fonts to add design impact.
- Editing and Enhancing a PowerPoint Presentation. Authored by: Nina Burokas. Provided by: Lumen Learning. License: CC BY: Attribution


