
13.14: Design and the Shopping Experience
- Page ID
- 75789
\( \newcommand{\vecs}[1]{\overset { \scriptstyle \rightharpoonup} {\mathbf{#1}} } \)
\( \newcommand{\vecd}[1]{\overset{-\!-\!\rightharpoonup}{\vphantom{a}\smash {#1}}} \)
\( \newcommand{\dsum}{\displaystyle\sum\limits} \)
\( \newcommand{\dint}{\displaystyle\int\limits} \)
\( \newcommand{\dlim}{\displaystyle\lim\limits} \)
\( \newcommand{\id}{\mathrm{id}}\) \( \newcommand{\Span}{\mathrm{span}}\)
( \newcommand{\kernel}{\mathrm{null}\,}\) \( \newcommand{\range}{\mathrm{range}\,}\)
\( \newcommand{\RealPart}{\mathrm{Re}}\) \( \newcommand{\ImaginaryPart}{\mathrm{Im}}\)
\( \newcommand{\Argument}{\mathrm{Arg}}\) \( \newcommand{\norm}[1]{\| #1 \|}\)
\( \newcommand{\inner}[2]{\langle #1, #2 \rangle}\)
\( \newcommand{\Span}{\mathrm{span}}\)
\( \newcommand{\id}{\mathrm{id}}\)
\( \newcommand{\Span}{\mathrm{span}}\)
\( \newcommand{\kernel}{\mathrm{null}\,}\)
\( \newcommand{\range}{\mathrm{range}\,}\)
\( \newcommand{\RealPart}{\mathrm{Re}}\)
\( \newcommand{\ImaginaryPart}{\mathrm{Im}}\)
\( \newcommand{\Argument}{\mathrm{Arg}}\)
\( \newcommand{\norm}[1]{\| #1 \|}\)
\( \newcommand{\inner}[2]{\langle #1, #2 \rangle}\)
\( \newcommand{\Span}{\mathrm{span}}\) \( \newcommand{\AA}{\unicode[.8,0]{x212B}}\)
\( \newcommand{\vectorA}[1]{\vec{#1}} % arrow\)
\( \newcommand{\vectorAt}[1]{\vec{\text{#1}}} % arrow\)
\( \newcommand{\vectorB}[1]{\overset { \scriptstyle \rightharpoonup} {\mathbf{#1}} } \)
\( \newcommand{\vectorC}[1]{\textbf{#1}} \)
\( \newcommand{\vectorD}[1]{\overrightarrow{#1}} \)
\( \newcommand{\vectorDt}[1]{\overrightarrow{\text{#1}}} \)
\( \newcommand{\vectE}[1]{\overset{-\!-\!\rightharpoonup}{\vphantom{a}\smash{\mathbf {#1}}}} \)
\( \newcommand{\vecs}[1]{\overset { \scriptstyle \rightharpoonup} {\mathbf{#1}} } \)
\(\newcommand{\longvect}{\overrightarrow}\)
\( \newcommand{\vecd}[1]{\overset{-\!-\!\rightharpoonup}{\vphantom{a}\smash {#1}}} \)
\(\newcommand{\avec}{\mathbf a}\) \(\newcommand{\bvec}{\mathbf b}\) \(\newcommand{\cvec}{\mathbf c}\) \(\newcommand{\dvec}{\mathbf d}\) \(\newcommand{\dtil}{\widetilde{\mathbf d}}\) \(\newcommand{\evec}{\mathbf e}\) \(\newcommand{\fvec}{\mathbf f}\) \(\newcommand{\nvec}{\mathbf n}\) \(\newcommand{\pvec}{\mathbf p}\) \(\newcommand{\qvec}{\mathbf q}\) \(\newcommand{\svec}{\mathbf s}\) \(\newcommand{\tvec}{\mathbf t}\) \(\newcommand{\uvec}{\mathbf u}\) \(\newcommand{\vvec}{\mathbf v}\) \(\newcommand{\wvec}{\mathbf w}\) \(\newcommand{\xvec}{\mathbf x}\) \(\newcommand{\yvec}{\mathbf y}\) \(\newcommand{\zvec}{\mathbf z}\) \(\newcommand{\rvec}{\mathbf r}\) \(\newcommand{\mvec}{\mathbf m}\) \(\newcommand{\zerovec}{\mathbf 0}\) \(\newcommand{\onevec}{\mathbf 1}\) \(\newcommand{\real}{\mathbb R}\) \(\newcommand{\twovec}[2]{\left[\begin{array}{r}#1 \\ #2 \end{array}\right]}\) \(\newcommand{\ctwovec}[2]{\left[\begin{array}{c}#1 \\ #2 \end{array}\right]}\) \(\newcommand{\threevec}[3]{\left[\begin{array}{r}#1 \\ #2 \\ #3 \end{array}\right]}\) \(\newcommand{\cthreevec}[3]{\left[\begin{array}{c}#1 \\ #2 \\ #3 \end{array}\right]}\) \(\newcommand{\fourvec}[4]{\left[\begin{array}{r}#1 \\ #2 \\ #3 \\ #4 \end{array}\right]}\) \(\newcommand{\cfourvec}[4]{\left[\begin{array}{c}#1 \\ #2 \\ #3 \\ #4 \end{array}\right]}\) \(\newcommand{\fivevec}[5]{\left[\begin{array}{r}#1 \\ #2 \\ #3 \\ #4 \\ #5 \\ \end{array}\right]}\) \(\newcommand{\cfivevec}[5]{\left[\begin{array}{c}#1 \\ #2 \\ #3 \\ #4 \\ #5 \\ \end{array}\right]}\) \(\newcommand{\mattwo}[4]{\left[\begin{array}{rr}#1 \amp #2 \\ #3 \amp #4 \\ \end{array}\right]}\) \(\newcommand{\laspan}[1]{\text{Span}\{#1\}}\) \(\newcommand{\bcal}{\cal B}\) \(\newcommand{\ccal}{\cal C}\) \(\newcommand{\scal}{\cal S}\) \(\newcommand{\wcal}{\cal W}\) \(\newcommand{\ecal}{\cal E}\) \(\newcommand{\coords}[2]{\left\{#1\right\}_{#2}}\) \(\newcommand{\gray}[1]{\color{gray}{#1}}\) \(\newcommand{\lgray}[1]{\color{lightgray}{#1}}\) \(\newcommand{\rank}{\operatorname{rank}}\) \(\newcommand{\row}{\text{Row}}\) \(\newcommand{\col}{\text{Col}}\) \(\renewcommand{\row}{\text{Row}}\) \(\newcommand{\nul}{\text{Nul}}\) \(\newcommand{\var}{\text{Var}}\) \(\newcommand{\corr}{\text{corr}}\) \(\newcommand{\len}[1]{\left|#1\right|}\) \(\newcommand{\bbar}{\overline{\bvec}}\) \(\newcommand{\bhat}{\widehat{\bvec}}\) \(\newcommand{\bperp}{\bvec^\perp}\) \(\newcommand{\xhat}{\widehat{\xvec}}\) \(\newcommand{\vhat}{\widehat{\vvec}}\) \(\newcommand{\uhat}{\widehat{\uvec}}\) \(\newcommand{\what}{\widehat{\wvec}}\) \(\newcommand{\Sighat}{\widehat{\Sigma}}\) \(\newcommand{\lt}{<}\) \(\newcommand{\gt}{>}\) \(\newcommand{\amp}{&}\) \(\definecolor{fillinmathshade}{gray}{0.9}\)
- Explain how store design can create a positive shopping experience for customers
Before we even start talking about store design, we should go over a couple of customer behaviors that inform those designs. Mainly,
- Shoppers walk counterclockwise. Every time you enter a mall, a supermarket, the corner store, you will veer to the right if you’re able. It’s just what people do.
- Shoppers avoid upper and lower floors. In fact, shoppers really enjoy staying on the same floor they started on when they entered the store.
- Shoppers hate narrow aisles. In most cultures, that is. If customers have to pass each other at an uncomfortably close distance, they won’t go down the aisle.
- Shoppers need to “orient” themselves. Referred to sometimes as the “transition zone” or “decompression zone,” this is the area where a customer gets used to the idea that he or she is in a store. It’s where they stop to see which way they might go. Usually there are shopping carts and welcome signs in this area, but not much else, because customers aren’t yet ready to focus on the shopping experience.
If your store design were to go against the grain of those customer idiosyncrasies, you’d already be at a disadvantage.
A store layout will show the size of each department, any permanent structures, shelving and other fixtures, and even customer traffic patterns. Let’s talk about a couple common layouts we see retailers using today, and how they affect the shopping experience.
Grid Layout
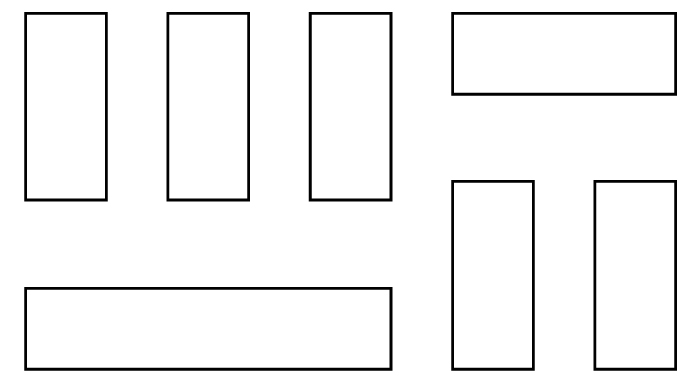 The grid store layout maximizes retail space and allows for the use of the walls, corner spaces, and any purchase retail displays. New store owners will often start with a grid display for their stores because it’s also the most economical choice—it makes use of everything in your store.
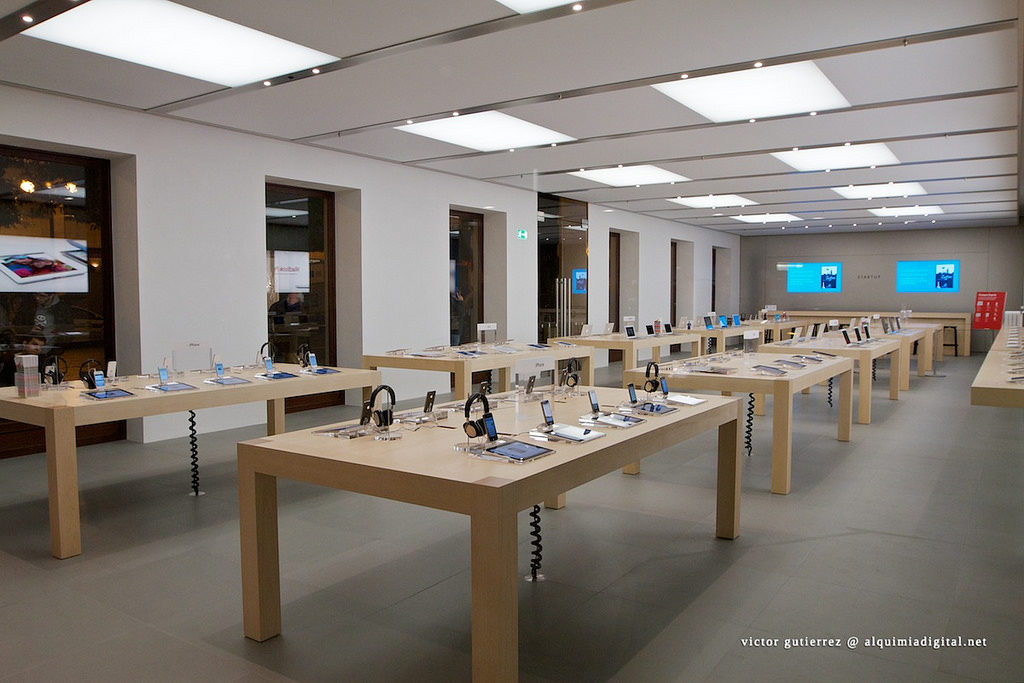
The grid store layout can be found in drugstores, like CVS and Walgreens, because they can pack a lot of products into the space. The drawback of the grid plan is that it usually interferes with a customer’s line of site, which is why you’ll often see aisles numbered and signs hanging from the ceiling, indicating which products can be found. On the other hand, the grid format doesn’t have to be used to “pack products in.” In fact, Apple uses the grid format to display their minimalist product line . . . and to great effect.
Angular Layout
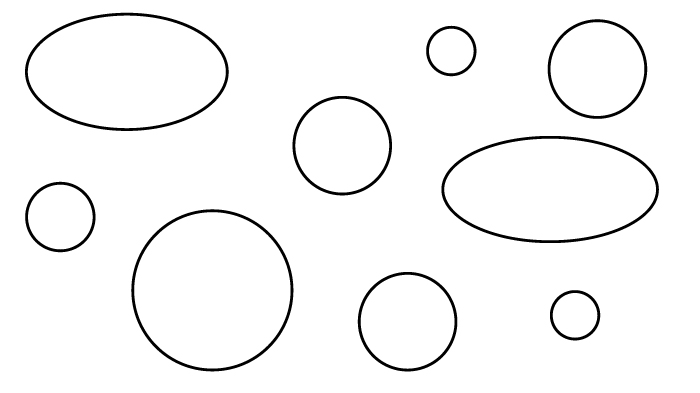 An angular store plan is best used for high-end products and a minimal inventory, because the display itself takes up a lot of space. Curved fixtures are set up in different areas of the store and show off only a few of a particular kind of product, sending the message to customers that it’s the last one of the bunch and they should “buy now!”
Jewelry stores and high-end clothing stores are most likely to use an angular store layout.
Geometric Layout
 If “hip and trendy” is the message you’re trying to convey, or if Millennials are your target customers, then the geometric store layout may be the answer to your prayers. You can get an interesting, not-so-ordinary effect without breaking the pocketbook.
Most of the time apparel stores are going to use the geometric store design, positioning fixtures at odd angles to achieve an interesting affect.

Other layouts
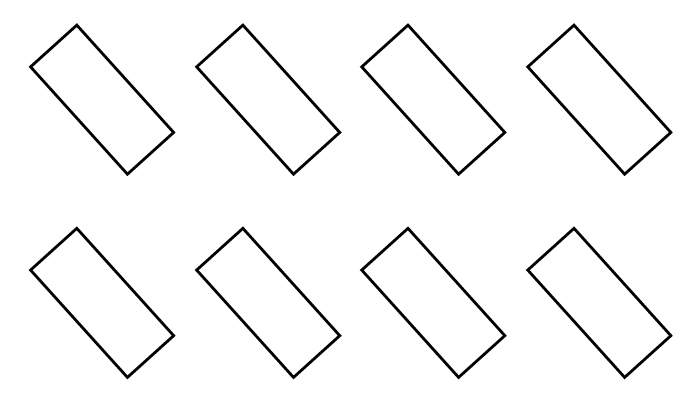 Diagonal Layout
In a diagonal layout, a retailer can still maximize wall space to display product the way he can when he sets up in a grid layout, but this solves some of the line-of-sight issues the grid format poses. Upon walking in, the customer can actually see a lot more product.
Racetrack (or “Loop”) Layout
 In a racetrack, or loop, layout, the customer enters the store and follows the path around the store, eventually returning to the front of the store to check out. Borders Books, now defunct, used the racetrack layout in their stores, which is not uncommon in large book stores. Bed, Bath and Beyond uses a racetrack layout very effectively. Often, department stores will set up each floor in a racetrack format, allowing customers to visit different departments along the way. Sears has a definite racetrack loop in most of its stores. This layout can also be used effectively in smaller, more high-end stores.

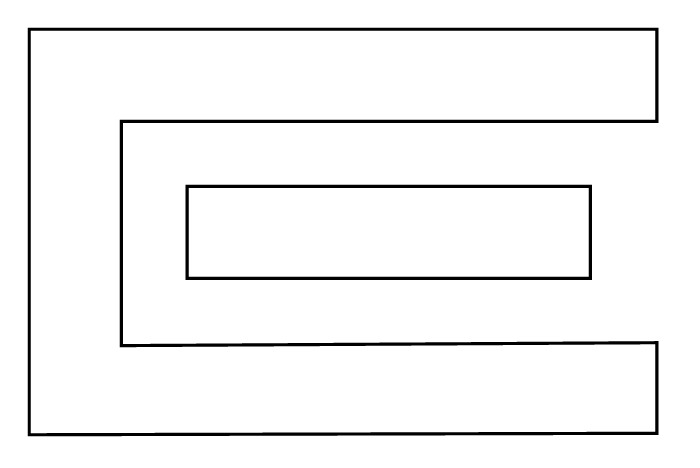
Forced Path Layout
 This is usually not a customer’s favorite kind of layout because it does not allow for customer-driven shopping decisions. Every once in a while, though, a retailer uses the forced path layout to its maximum potential.
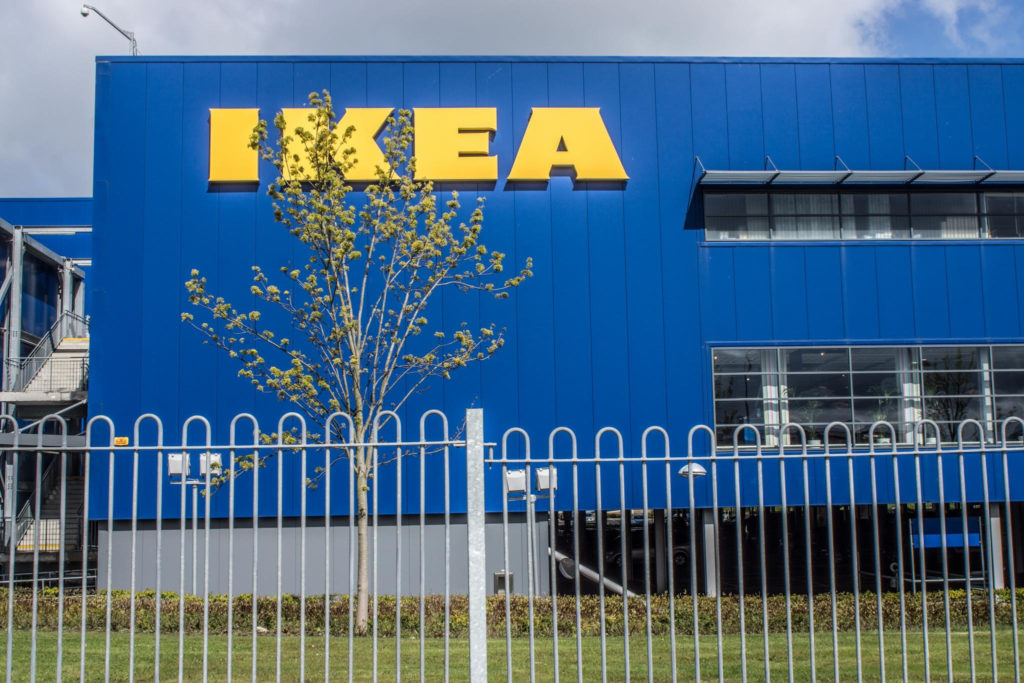
Perhaps the most prominent example of this layout is IKEA; while the stores are often massive, there is a prescribed path that takes customers through every part of the store (with helpful arrows on the ground!).
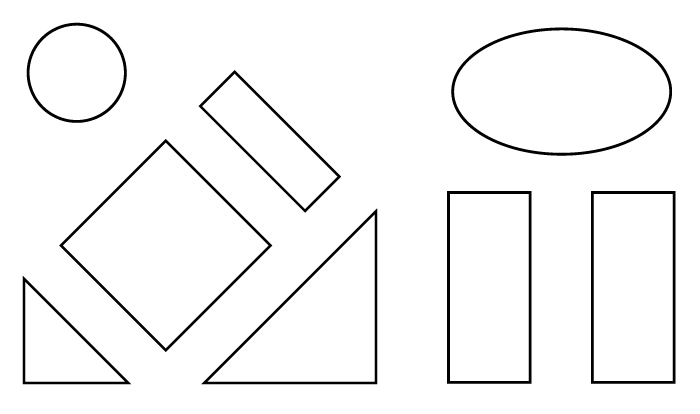 Mixed (or “Free Form”) Layout
Suitable for almost any retailer, mixed layouts allow you to borrow the best from all of the layouts to highlight your products. This can be especially effective in stores that offer different types of products.
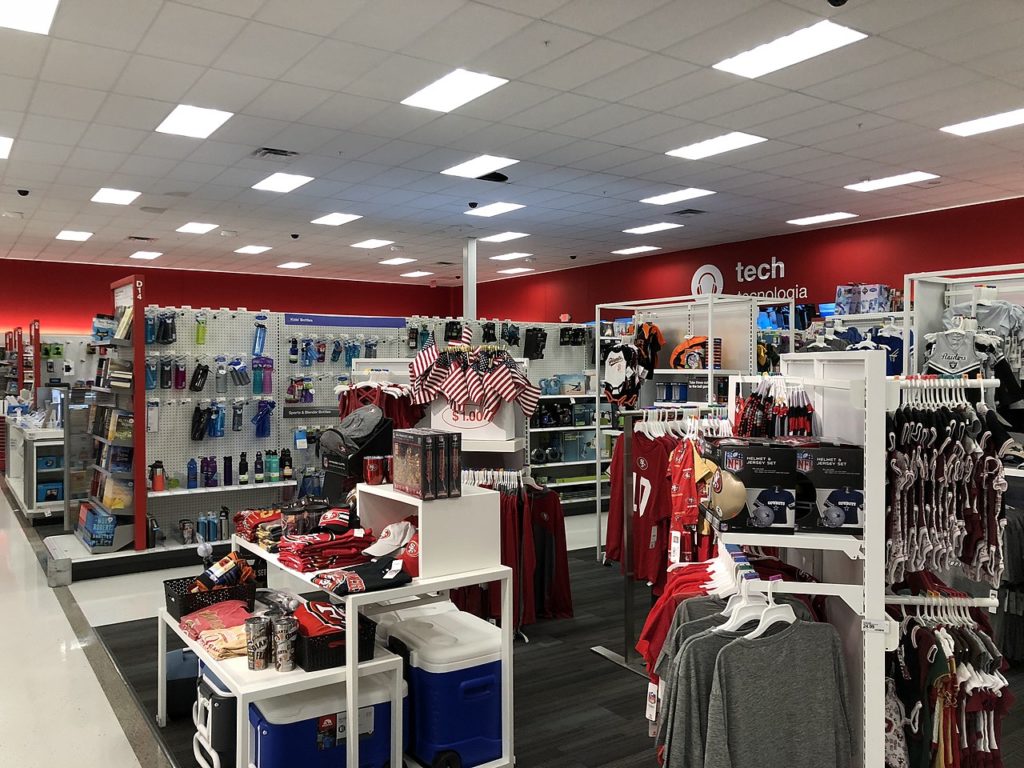
Target is an excellent example of a store using a mixed layout—grid in their grocery area, but geometric and angular in others, depending on the product being displayed.
Which to Use?
Each one of these layouts sends a different message to the shopper and promotes a particular kind of shopping experience. A retailer has to consider the type of product being sold and the amount of inventory being displayed, the target demographic, and the budget he has to work with before he can determine which is the correct layout for his store.
Contributors and Attributions
- Design and the Shopping Experience. Authored by: Freedom Learning Group. Provided by: Lumen Learning. License: CC BY: Attribution
- Store Layout Diagrams. Provided by: Lumen Learning. License: CC BY: Attribution
- Inauguracion Apple store calle Colon Valencia #153. Authored by: Victor Gutierrez Navarro. Located at: https://flic.kr/p/aQyHc6. License: CC BY: Attribution
- IKEA store just off the Ballymun Road. Authored by: William Murphy. Provided by: Flickr. Located at: https://flic.kr/p/bNzdEa. License: CC BY-SA: Attribution-ShareAlike
- HK Causeway Bay clothing shop. Authored by: Navmulas. Provided by: Wikimedia Commons. Located at: https://commons.wikimedia.org/wiki/File:HK_Causeway_Bay_%E5%88%A9%E8%88%9E%E8%87%BA%E5%BB%A3%E5%A0%B4_Lee_Theatre_Plaza_clothing_shop_Esprit_02_interior.JPG. License: CC BY-SA: Attribution-ShareAlike
- HK Central IFC Mall shop interior Armani Jeans. Authored by: ChIfcapsho. Provided by: Wikimedia Commons. Located at: https://commons.wikimedia.org/wiki/File:HK_Central_IFC_Mall_shop_interior_Armani_Jeans_visitors_May-2012.JPG. License: CC BY-SA: Attribution-ShareAlike
- Target Palo Alto. Authored by: FASTILY. Provided by: Wikimedia Commons. Located at: https://commons.wikimedia.org/wiki/File:Target_Palo_Alto_5_2018-08-06.jpg. License: CC BY-SA: Attribution-ShareAlike