
4.3: Tab Stops
- Page ID
- 46469
Learning Objectives
- Set tab stops.
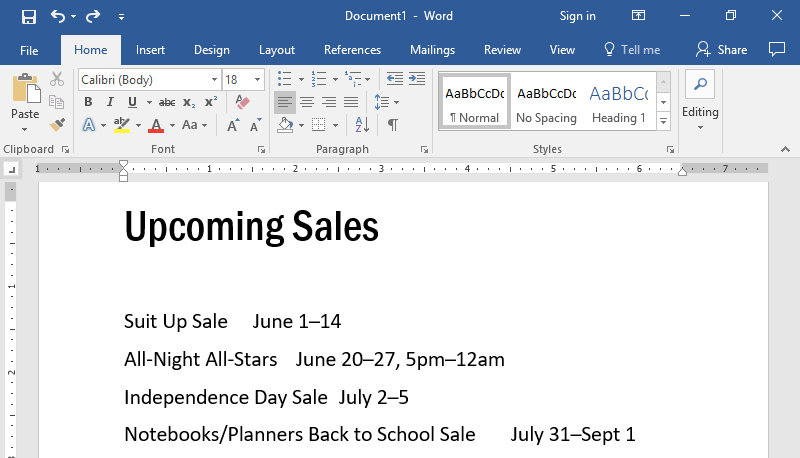
You may recall from Alignment, Justification, and Indentation that hitting the Tab key indents a paragraph. Each hit of the Tab key inserted a tab space. By default, a tab space stretches to fit the next 1/2 inch interval on the page. Tab stops control the width of a tab space so that it can be greater or less than 1/2 an inch.
By changing the width of tab spaces, you can align text with tab stops rather than the edge of a column, page, or margin. This can be useful for aligning text different ways in the same line.
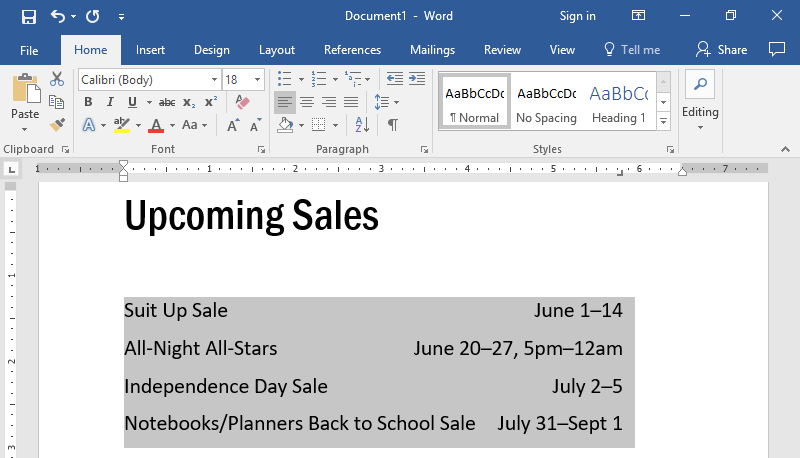
 Without tab stops |  With tab stops |
There are several kinds of tab stops, but the ones we will focus on in this course are the left tab, the center tab, and the right tab.
 Left tab |  Center tab |  Right tab |
| Aligns text left along the tab stop line | Aligns text centrally to the tab stop line | Aligns text right along the tab stop line |
 |  |  |
There are two main methods for setting tab stops: the ruler and the tab dialog box.
Tab Stops Using the Ruler
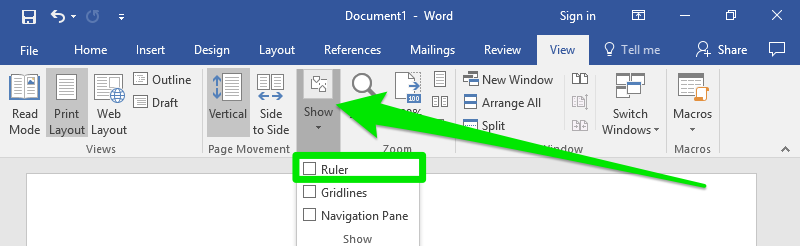
First, make the ruler visible (if it isn’t visible already). Go to View>Show and check the Ruler box.
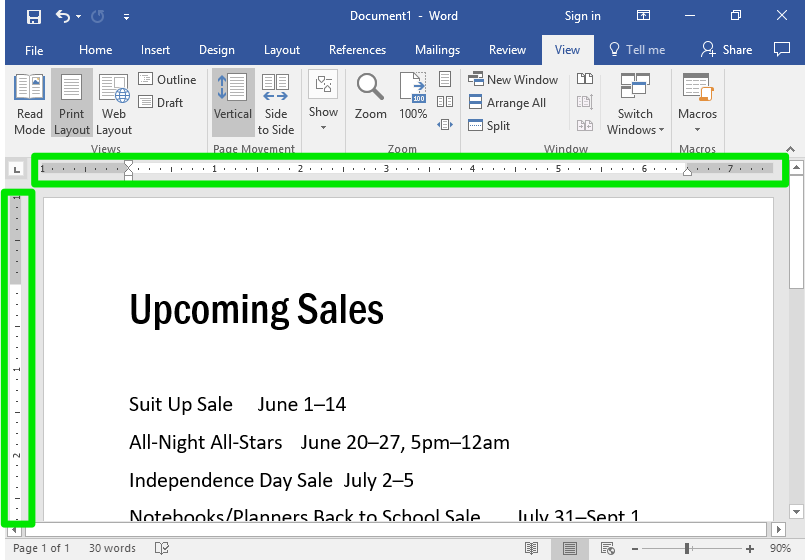
The rulers display the width of the page in inches. The shaded-in gray spaces on the ruler represent the margins. This screenshot shows margins of one inch.
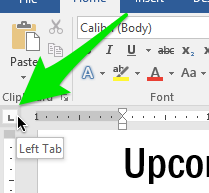
To add a tab stop, select the paragraph or paragraphs the tab stop will be added to. Select the type of tab stop by clicking the tab selector icon in the top-left corner until it shows the appropriate icon (![]() ,
, ![]() ,
, ![]() ). The tab selector button is located at the top of the vertical ruler and to the left of the horizontal ruler.
). The tab selector button is located at the top of the vertical ruler and to the left of the horizontal ruler.
(Note: there are more tab options, such as decimal tab, bar tab, first-line indent, and hanging indent. Feel free to experiment with these later.)
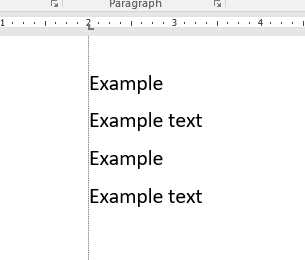
Once the type of tab stop you want is selected, click anywhere along the horizontal ruler to place the tab stop.

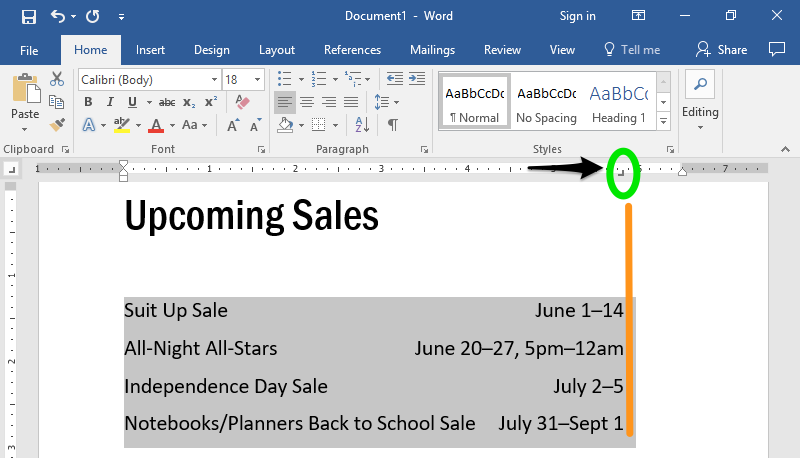
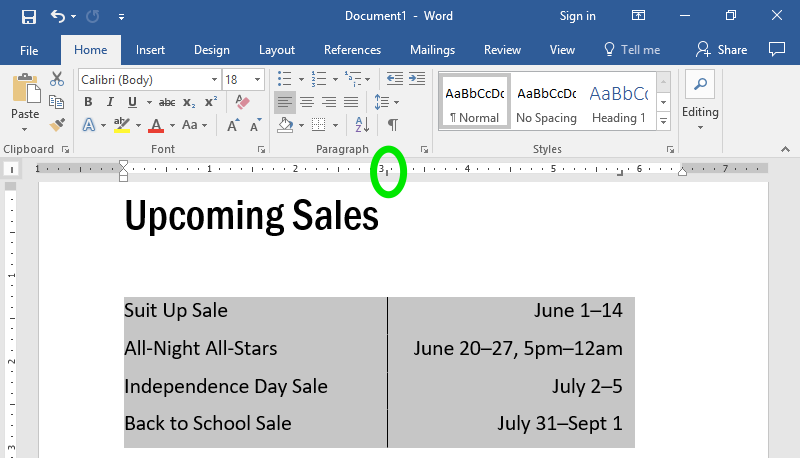
The tab stop is represented by the icon in the ruler. In the screenshot above, the right tab is marked with a green circle. Notice that the lines below are right-aligned with the tab stop, with the exception of the last line. The last line is not aligned because the line is too long for the text to fit with the right-align.
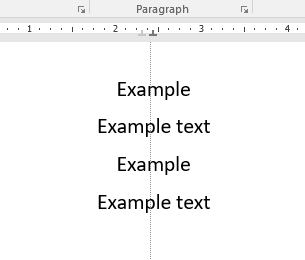
To move the tab stop, click and drag the tab icon along the ruler.
The selected paragraphs moved with the tab stop. (And notice that the last line is aligned now that there is enough space for the text.)
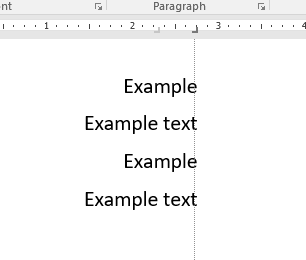
To remove a tab stop, click the icon and drag it off of the ruler.
Practice Question
Tab Stops Using the Tab Dialog Box
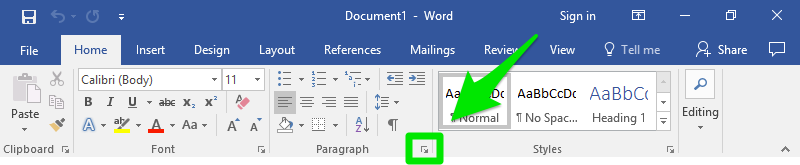
You can also add and move tab stops using the tab dialog box. To reach it, go to the Paragraph dialog box in the Home tab.
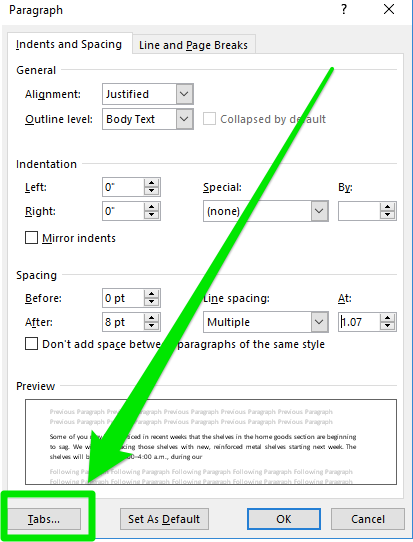
Then click the Tabs button at the bottom-left corner of the Paragraph dialog box.
You have now reached the Tab dialog box.
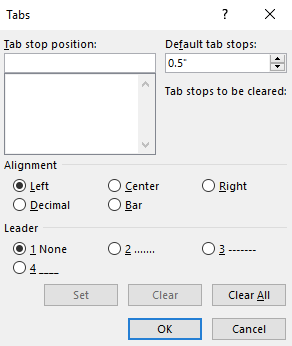
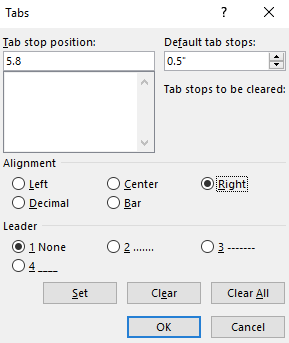
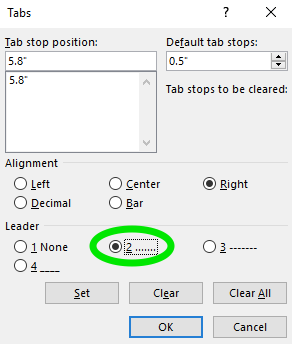
Choose which type of tab stop you want in the Alignment area (Left, Center, Right, Decimal, or Bar). Type the distance of the tab stop in inches, then click Set or OK to apply that tab stop to whichever lines are selected.
 |  |
Use Clear to remove tab stops. You can also still click and drag the tab stop along the ruler to change its location or drag the tab stop off the ruler to delete it.
Leader
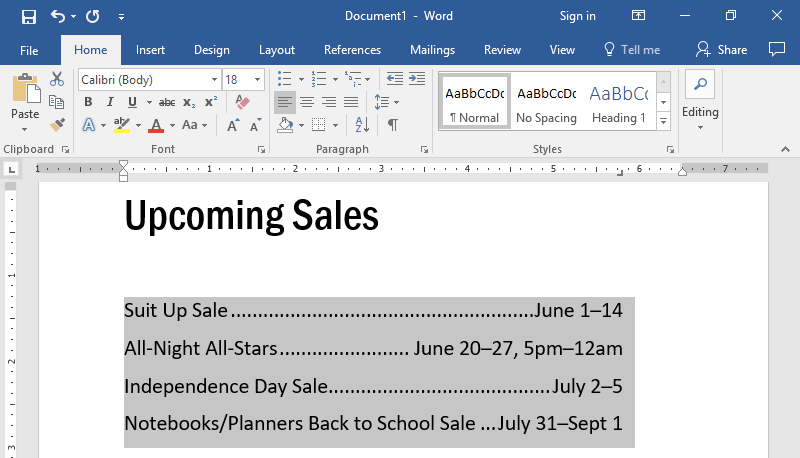
The leader is a filler for the tab space. Instead of leaving the tab space blank, you can fill it with periods or other characters. This is particularly useful for a table of contents, but it can have other applications too. To choose a leader, select one of the options under the Leader section of the Tab dialog box.
 |  |
Optional: Bar and Decimal Tabs
Two of the other tab stop types are the bar and decimal tabs.
The bar tab icon is a straight vertical line (|). Bar tabs do not align text. Instead, a bar tab adds a straight vertical line at the point of the bar tab. The line will be the length of the selected lines.
The decimal tab icon is ![]() . Decimal tabs align text based on the placement of periods (or rather, decimal points). This is useful when lining up numbers, especially dollar amounts.
. Decimal tabs align text based on the placement of periods (or rather, decimal points). This is useful when lining up numbers, especially dollar amounts.
| Side-by-Side Comparison of Decimal Tab Alignment | |
|---|---|
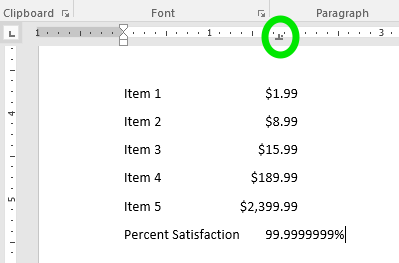 | 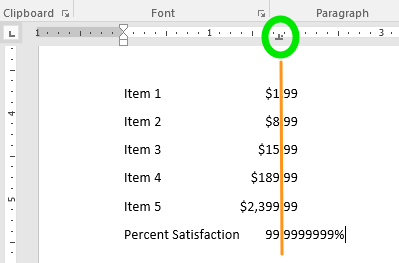 |
Notice that when a decimal tab is applied, the decimal points will line up regardless of what is on either side of the decimal point.
Contributors and Attributions
- Tab Stops. Authored by: Lumen Learning. License: CC BY: Attribution
- Lower Right. Authored by: Travis Avery. Located at: https://thenounproject.com/term/lower-right/546558/. License: CC BY: Attribution
- Lower Left. Authored by: Travis Avery. Located at: thenounproject.com/term/lower-left/546557/. License: CC BY: Attribution
- Vertical Line. Authored by: Hector. Located at: https://thenounproject.com/cstudent11235/collection/vertical-line/?i=656405. License: CC BY: Attribution. License Terms: Used in modifying Travis Avery's work to make new icon