
8.16: Visuals- Images, Videos, and Objects
- Page ID
- 46208
Learning Outcomes
- Add images and clip art
- Add videos
- Arrange objects
Adding Images and Clip Art
Adding art, images and photographs is a way to both personalize your slides and reinforce your message.
Adding visual elements to your slides is done from the Insert tab. Images can also be inserted directly from a new slide using the Add Pictures, Online Pictures or Online Video icons embedded in new slide layouts.

To add pictures from your computer
- Select the Insert tab
- Click on Picture
- Select your desired image
- Press Open to insert
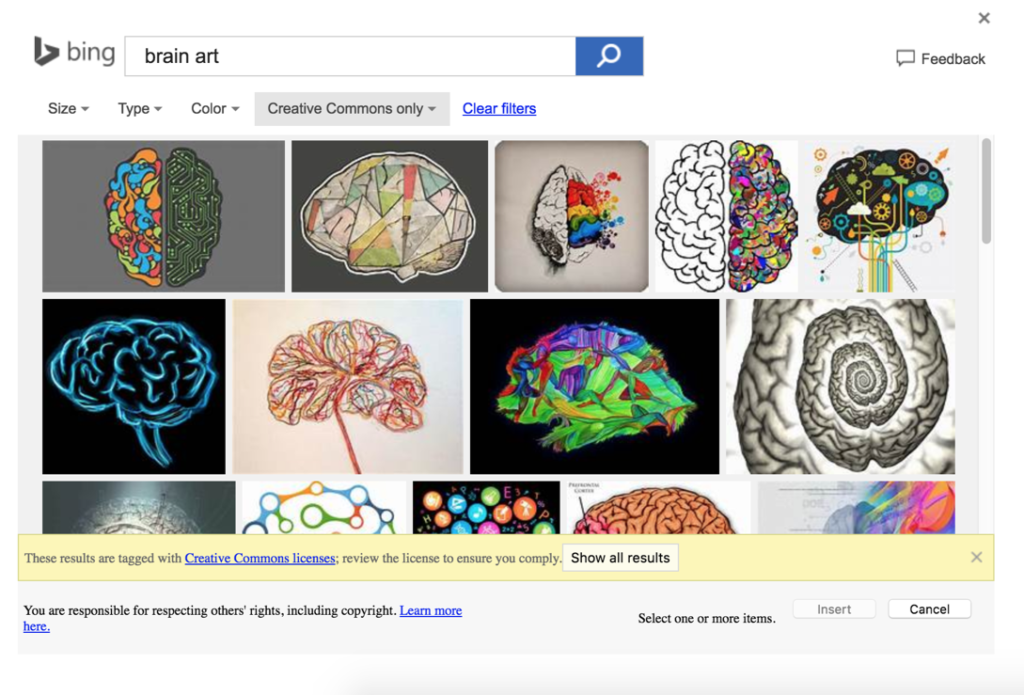
The Add Pictures From the Internet option allows for two possibilities: searching via Bing and uploading images from OneDrive (Microsoft’s cloud storage product). Of course, you can also do an image search using Google Images or your preferred search engine, download images to your desktop and upload them to your presentation using the steps above. Don’t be put off by the initial Bing images served up. Bing’s filters allow you to search by size (small, medium, large, extra large), type (all, photograph, clip art, line drawing and transparent), color (all, color, B&W and by 12 basic colors) and license (all or Creative Commons only).
To add pictures from the Internet
- Select the Insert tab
- Click on Online Pictures
- Type in your search term(s)
- Refine your image search using Bing’s size, type, color and license filters
- Select an image
- Press Insert to insert into slide
- Use the corner image “handles” (small boxes) to size
Practice Question
Adding Videos
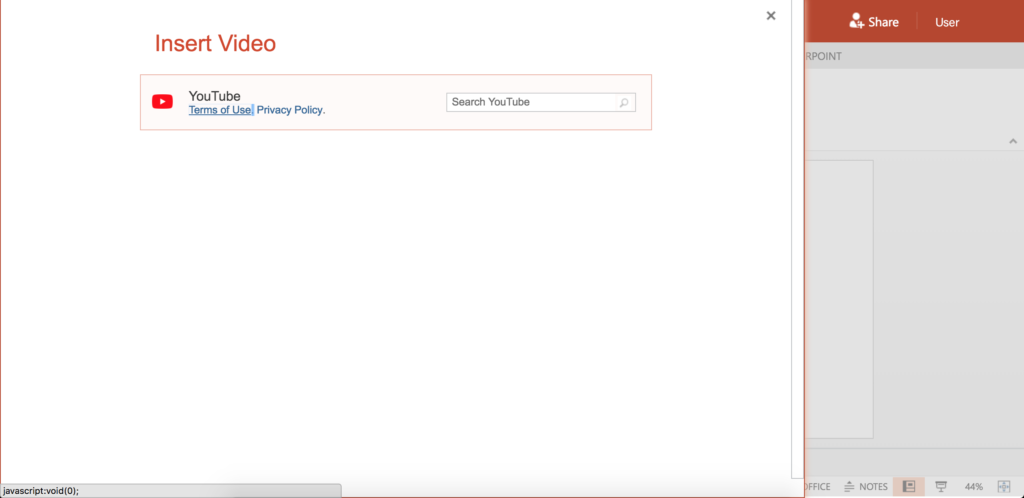
Adding video allows you to incorporate both motion and sound into your presentation and this can translate into audience energy! As with other visual elements, video is an Insert tab command.

The add video command launches a YouTube video search. To see video details, hover over the video. To view the video once embedded, click on the View tab, select Current Slide and press Play.
To add video
- Select the Insert tab
- Click on Online Video
- Enter your search terms
- Select your desired video
- Press Open to insert
Practice Question
Arrange Objects
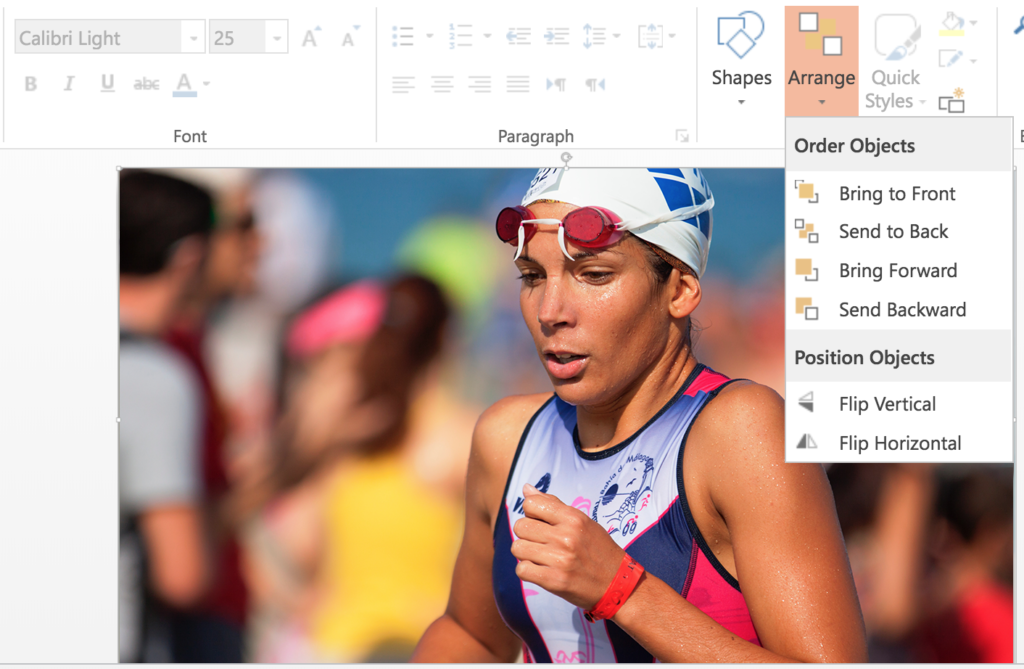
There may be times when default line spacing doesn’t work or you’re trying to build a slide that involves multiple blocks of text and/or imagery. That’s where PowerPoint’s Arrange function comes into play. Arrange allows you to order (layer) objects, bringing individual elements forward or sending them backwards. It also allows you to flip objects. Refer to Figure 4 for a screen shot.
Practice Question
- Visuals: Images, Videos, and Objects. Authored by: Nina Burokas. Provided by: Lumen Learning. License: CC BY: Attribution
- Triatleta photo. Authored by: Quino Al. Provided by: Unsplash. Located at: https://unsplash.com/photos/PTWyikFE3sc. License: CC0: No Rights Reserved