Business LibreTexts

7.12: Modify Graphics

  • Page ID
    46529
  • \( \newcommand{\vecs}[1]{\overset { \scriptstyle \rightharpoonup} {\mathbf{#1}} } \) \( \newcommand{\vecd}[1]{\overset{-\!-\!\rightharpoonup}{\vphantom{a}\smash {#1}}} \)\(\newcommand{\id}{\mathrm{id}}\) \( \newcommand{\Span}{\mathrm{span}}\) \( \newcommand{\kernel}{\mathrm{null}\,}\) \( \newcommand{\range}{\mathrm{range}\,}\) \( \newcommand{\RealPart}{\mathrm{Re}}\) \( \newcommand{\ImaginaryPart}{\mathrm{Im}}\) \( \newcommand{\Argument}{\mathrm{Arg}}\) \( \newcommand{\norm}[1]{\| #1 \|}\) \( \newcommand{\inner}[2]{\langle #1, #2 \rangle}\) \( \newcommand{\Span}{\mathrm{span}}\) \(\newcommand{\id}{\mathrm{id}}\) \( \newcommand{\Span}{\mathrm{span}}\) \( \newcommand{\kernel}{\mathrm{null}\,}\) \( \newcommand{\range}{\mathrm{range}\,}\) \( \newcommand{\RealPart}{\mathrm{Re}}\) \( \newcommand{\ImaginaryPart}{\mathrm{Im}}\) \( \newcommand{\Argument}{\mathrm{Arg}}\) \( \newcommand{\norm}[1]{\| #1 \|}\) \( \newcommand{\inner}[2]{\langle #1, #2 \rangle}\) \( \newcommand{\Span}{\mathrm{span}}\)\(\newcommand{\AA}{\unicode[.8,0]{x212B}}\)

    Learning Objectives

    • Modify graphics

    Once a graphic has been inserted into a worksheet, text or data will need to be entered and edited. The graphic can also be modified to fit the scale and style desired for a worksheet. The following actions can be taken for any graphic selected in Excel:

    1. Adding/editing text
    2. Resizing graphic
    3. Changing design style
    4. Moving graphics
    5. Rotating graphics
    Excel screenshot of SmartDesign Graphic menu options. Five highlighted areas; adding text, resizing, changing design style, moving, rotating graphic.

    Adding/Editing Text

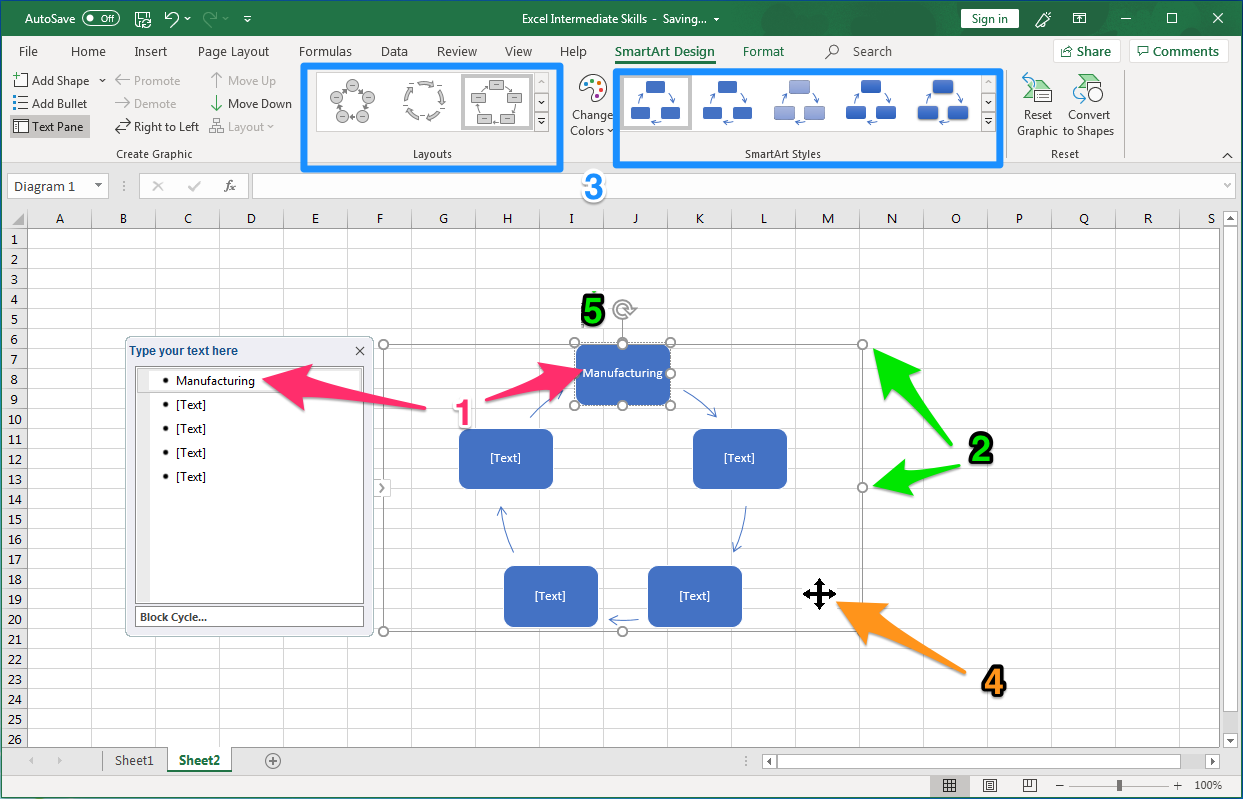
    Type text into the graphic by either selecting the [Text] area in the graphic, or by selecting [Text] in the Type your text here dialog box to the left. If there is no text dialog box on the left, click on the graphic and the box will open. If there is data or text from within a worksheet such as labels, values, etc. you wish to add to the graphic, select the desired text and copy and paste into the graphic. Editing text in a graphic is the same process as adding a graphic’s text.
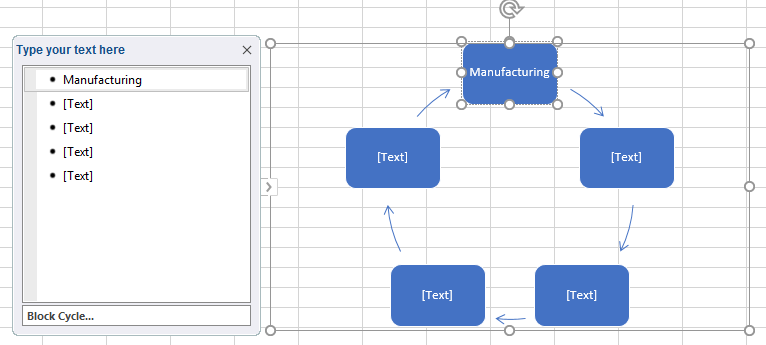
    Excel screenshot of SmartDesign Graphic close up of adding text to a graphic in both the graphic and the text box menu.

    Resizing Graphic

    Select a point on the outer edge of a graphic, hold down the left mouse button (or cursor) and drag the graphic to fit the size desired.
    Excel screenshot of SmartDesign Graphic close up of resizing a graphic.

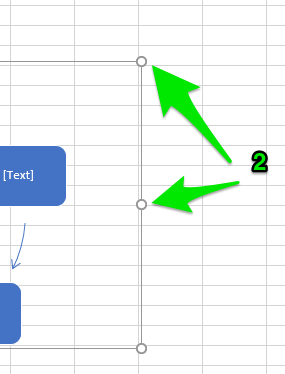
    Changing Design Style

    Roll the cursor over the layout or SmartArt style sections to see the various options that are available for the selected graphic. Select the style best suiting the purpose of the graphic.
    Excel screenshot of SmartDesign Graphic menu graphic layouts, styles, and colors.

    Moving Graphics

    To place a graphic next to an Excel table or other desired spot, hold down the cursor until the four-way arrow appears, while continuing to hold, drag the graphic within the worksheet to the desired location.
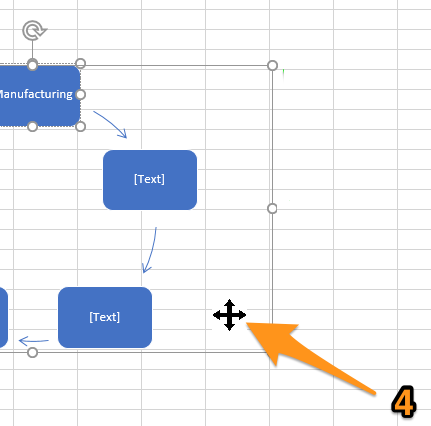
    Excel screenshot of SmartDesign Graphic close up of moving graphic in worksheet.

    Rotating Graphics

    To rotate a graphic in an Excel worksheet, place the cursor on the circular arrow and drag to rotate the graphic.
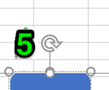
    Excel screenshot of SmartDesign Graphic close up of rotating a graphic in worksheet.

    Contributors and Attributions

    CC licensed content, Original
    • Modify Graphics. Authored by: Sherri Pendleton. Provided by: Lumen Learning. License: CC BY: Attribution

    7.12: Modify Graphics is shared under a CC BY license and was authored, remixed, and/or curated by LibreTexts.

    • Was this article helpful?